Laser Length Measurement System
 | ||
Download Laser Length Measurement System - 1MByte pdf
The system assumes that the other end of the object has a fixed position and direction during the measurement. The camera is mounted directly over the part of the object being measured.
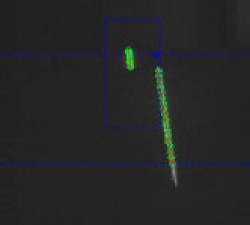
The laser light illuminates the object with a line. Since the laser is mounted in a 45 - 60 degrees angle versus the object, the laser line will shift position at the end of the object. The image from the camera will look like the small image below, where the shift in position is clearly displayed. The systems will detect the two lines, select the line on top of the object and measure the position of the end point.
System Description
The Scorpion Laser measurement system consists of the following parts:
Junction box with camera and laser.
The camera is positioned in one end of the Junction box and the laser in the other.
Firewire Interface card
RealVNC for remote operation
Scorpion Vision Software CD and a license key
Scorpion Laser Length Measurement Profile
The system is connected to a Personal Computer with a firewire cable. The system can communicate with external systems using RS232, OPC and TCP/IP by sending start and stop, status and measurement data.
Scorpion Vision Software CD
Scorpion Vision Software is distributed on a CD with the following contents: Scorpion Vision Software, System requirements, Scorpion setup program, Camera drivers, Documentation and Support programs.
Scorpion Laser Length Measurement profile
The Laser Length Measurement profile is contained in a zip file to easily being updated or verified over e-mail and internet.
User Interface
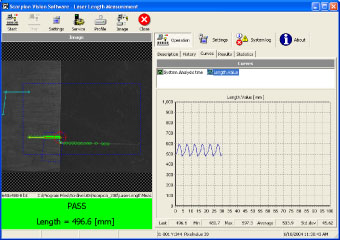
The following information is available in the user interface:
Camera image
Inspection result with indicator panels
Description - Web page that contains a short description of the inspection task
History - displays the latest inspection results
Curves - give a graphical view of measured values
Results - show measured values of the latest inspection
Statistics - give a periodical view of the inspection results

